
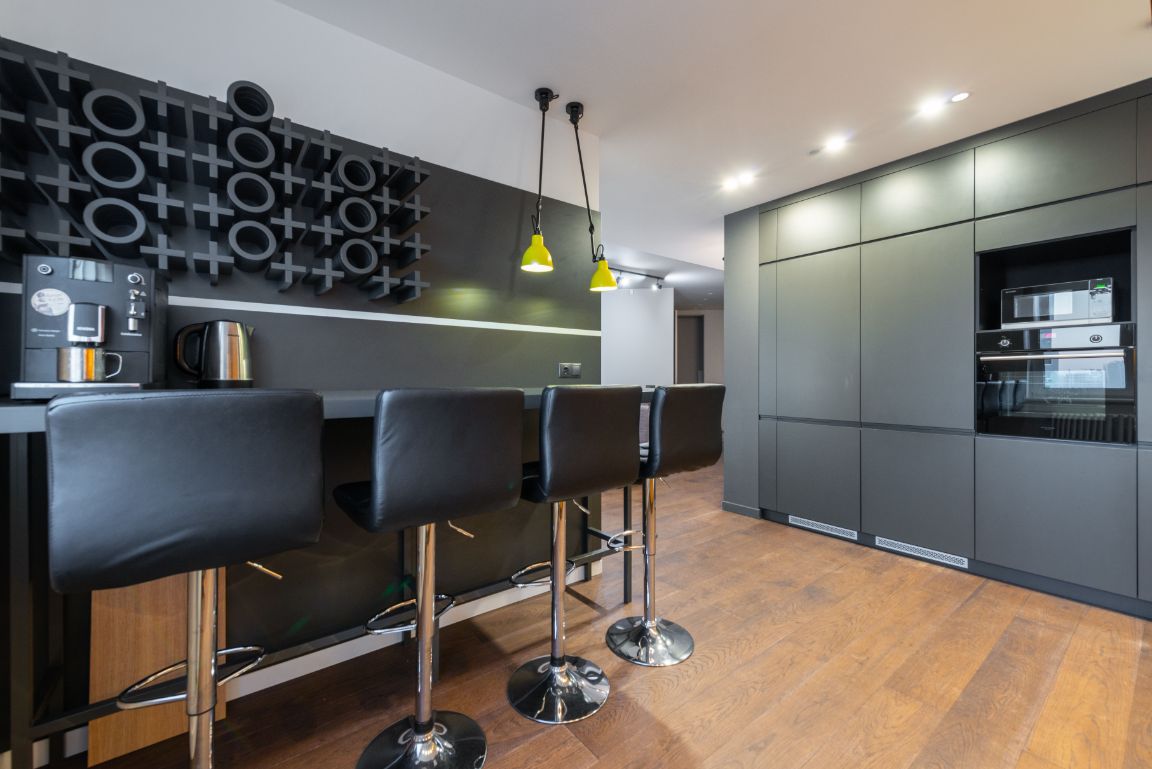
A useful home coffee bar does not need custom cabinets, café signs, or a large collection of matching jars.
It needs four things:
- Enough room to make coffee without constantly moving equipment.
- Convenient access to power and water.
- Storage for the items you use every day.
- A simple place for spills, used grounds, filters, or capsules.
Start with the way you already make coffee. Then build the station around that routine.
An espresso setup needs room for grinding, tamping, steaming, and knocking out coffee pucks. A pod machine may only need capsules, mugs, and a small waste container. A pour-over station needs vertical space for a kettle and shelves, but very little permanent countertop machinery.
The best DIY coffee bar is not the most decorated one. It is the one that still feels easy to use and clean six months later.
Plan the workflow before choosing the furniture
Most coffee-bar inspiration begins with colors, shelves, signs, and cabinets.
A better starting point is the movement of making a drink.
A practical coffee station usually needs three small zones:
| Zone | What happens there |
|---|---|
| Preparation | Measuring beans, grinding, dosing, adding filters or capsules |
| Brewing | Operating the coffee maker, kettle, espresso machine, or brewer |
| Cleanup | Disposing of grounds, rinsing tools, wiping milk and water |
These zones do not need separate counters. They may only occupy different parts of the same 36-inch-wide surface.
The important point is that one activity should not constantly block another.
For example, do not store the grinder behind the espresso machine if you must pull it forward for every drink. Do not place the knock box on the opposite side of the kitchen if the portafilter drips across the floor on the way there.
Measure these things before buying anything
A cabinet or cart can look large enough in a photograph and still be frustrating in daily use.
Measure your actual equipment and record:
| Measurement | Why it matters |
|---|---|
| Machine width | Determines the minimum surface area |
| Machine depth | Prevents the appliance from hanging over the edge |
| Height with lids closed | Checks basic shelf clearance |
| Height with water tank or bean hopper open | Prevents overhead shelves from blocking refilling |
| Portafilter or carafe movement | Leaves room to insert, remove, and pour |
| Cord length | Determines whether the machine can safely reach the outlet |
| Drawer and cabinet opening | Prevents handles or equipment from blocking storage |
| Nearest water source | Affects refilling and cleanup |
| Nearest trash or compost | Affects grounds and capsule disposal |
Leave a little extra room around the measurements.
A coffee bar designed to fit equipment exactly may become unusable when you need to remove the water tank, open a grinder hopper, replace a filter, or access the back of the machine.
Choose the location before the style
The best location is usually not the prettiest empty wall. It is the place that removes unnecessary steps from your morning.
Look for:
- a stable, level surface
- access to the correct electrical outlet
- reasonable distance from the sink
- enough light to measure and clean
- space to open water tanks and hoppers
- protection from strong sunlight
- room for drips and loose grounds
- a path that does not block cooking or food preparation
Do not position hot appliances near the edge of a narrow cart or where a cord can be pulled.
Breville’s Dual Boiler manual, for example, tells owners to place the machine on a level, clean surface free from water, keep it away from the counter edge, and prevent the cord from hanging where it could be pulled or tripped over. That manual also recommends a grounded, dedicated circuit for that specific high-powered model. Check the requirements for your own equipment rather than assuming every coffee machine has identical electrical needs.
1. The single-counter coffee corner
This is the easiest setup for most kitchens.
Choose one end of an existing counter and give it a clear boundary. That boundary can be:
- a washable tray
- a narrow backsplash section
- a shelf above the machine
- one dedicated drawer below
- a small group of matching containers
Keep the main appliance and grinder on the counter. Store spare filters, cleaning tablets, unopened coffee, and less-used tools in the drawer or cabinet.
A tray is particularly useful for small accessories because it makes scattered items feel like one organized group and can be lifted when the counter needs cleaning. Recent home-organization guidance also recommends keeping only frequently used pieces visible while moving backups and occasional accessories into hidden storage.
Best for
- small kitchens
- renters
- one primary brewing method
- people who already have free counter space
- anyone who does not want to buy furniture
Avoid
- covering the entire counter with mugs
- placing bean containers in direct sun
- storing supplies behind the machine
- using a tray that traps water beneath the appliance
- adding shelves before checking water-tank clearance
2. The cabinet-and-drawer coffee station
A base cabinet or sideboard gives you a permanent surface with hidden storage underneath.
This works well when you own several items but do not want everything visible.
A practical drawer arrangement might use:
Top drawer
- scale
- filters
- measuring scoop
- coffee brush
- stirring tools
- dosing funnel
- spare towels
Middle drawer
- unopened coffee
- tea
- hot chocolate
- syrups
- travel mugs
Lower cabinet
- cleaning products
- extra brewer
- milk pitcher
- large French press
- spare filters
- appliance manuals
Do not turn every drawer into mixed coffee storage. Assign each one a purpose so you do not search through descaling solution, paper filters, and mugs every morning.
Best for
- espresso setups
- households with several brewing methods
- people who prefer hidden storage
- larger kitchens or dining areas
- anyone building a long-term coffee station
3. The rolling coffee cart
A cart is useful when you cannot dedicate permanent countertop space.
It can move:
- beside the dining table in the morning
- into a pantry after use
- between the kitchen and home office
- away from the wall for cleaning
- into a different room when entertaining
Choose a cart with a stable top, locking wheels, and shelves that can support the equipment safely.
A lightweight decorative cart may be adequate for mugs and a manual brewer but unsuitable for a heavy espresso machine.
A practical cart layout
Top: coffee maker, grinder, small tray
Middle: mugs, beans, filters, kettle
Bottom: cleaning products, spare supplies, waste container
Keep heavy items low when possible, especially if the cart moves regularly.
Best for
- renters
- apartments
- flexible spaces
- pod or manual-brewing setups
- people who occasionally serve coffee in another room
Less suitable for
- large espresso machines
- powerful grinders that vibrate
- uneven floors
- areas without a safe nearby outlet
- setups that require frequent water refilling
4. The small coffee drawer
A coffee bar does not need to occupy an entire surface.
Keep only the machine and grinder visible, then dedicate one nearby drawer to everything else.
Use dividers for:
- filters
- measuring tools
- capsules
- stirrers
- brushes
- cleaning cloths
- reusable straws
- spare gaskets
- small accessories
This works especially well when the kitchen already has a suitable appliance counter but tends to look cluttered.
The drawer should not become a place where every unused coffee accessory disappears. Remove items you no longer use rather than allowing the drawer to fill until nothing is easy to reach.
5. The hidden pantry coffee bar
A pantry, appliance garage, or cabinet with retracting doors can hide the entire station when it is not being used.
This creates a clean room but needs more planning than an open counter.
Check:
- heat and ventilation
- outlet access
- door clearance
- steam from kettles and espresso machines
- water-tank removal
- lighting
- the ability to wipe spills
- whether the manufacturer permits use inside the enclosure
Do not operate a hot appliance inside a closed cabinet unless the space and appliance were designed for that use.
Even when the doors remain open while brewing, steam can affect the cabinet above. A washable interior and adequate open space make the setup easier to maintain.
Best for
- minimalist kitchens
- remodels
- large pantries
- homeowners planning electrical work
- people who want visual clutter hidden
6. The vertical coffee station
When counter width is limited, use the wall above the station.
Useful additions include:
- one shallow shelf for mugs
- hooks beneath the shelf
- a rail for towels and small tools
- a pegboard
- a magnetic timer
- a narrow wall-mounted filter holder
Keep heavy items, glass containers, and frequently refilled water vessels on the counter or in a secure cabinet rather than a high shelf.
Do not install the lowest shelf so close that it blocks:
- a grinder hopper
- a hinged water-tank lid
- steam rising from the machine
- removing the brewer
- adding water to a kettle
A vertical setup should add access, not turn every refill into a puzzle.
7. The sideboard coffee bar
A dining-room sideboard can become a coffee station without changing the kitchen.
This works particularly well when:
- the dining room is close to the kitchen
- the kitchen counters are full
- guests often serve themselves
- the sideboard already has drawers and doors
- you want coffee separate from cooking
Before placing appliances there, confirm that the furniture is deep and stable enough.
Many decorative console tables are narrower than kitchen counters. A machine may fit physically but leave little working room in front of it.
Protect wood and painted surfaces with a water-resistant mat or tray, especially beneath:
- espresso machines
- kettles
- milk frothers
- drip coffee makers
- water reservoirs
8. The office coffee station
A home-office coffee station should minimize noise, smell, and cleanup.
A sensible office setup might include:
- pod machine
- compact drip brewer
- AeroPress
- electric kettle
- manual grinder
- insulated mug
- small water container
- covered waste bin
Avoid building a complicated espresso setup in a room without water access unless you are willing to carry:
- fresh water
- used pucks
- milk
- dirty tools
- drip-tray water
The station may look convenient, but the repeated trips back to the kitchen can make it less useful than brewing there in the first place.
A manual brewer or pod machine generally suits an office better because the cleanup is contained.
9. The espresso-focused coffee bar
Espresso requires more working room than the machine dimensions suggest.
A practical arrangement is:
Grinder → dosing and tamping area → espresso machine → milk and cleanup areaThis follows the natural drink-making order.
Keep within reach
- grinder
- scale
- tamper
- dosing funnel
- puck-preparation tools
- milk pitcher
- cleaning brush
- steam-wand cloth
- knock box
- cups
Keep nearby but hidden
- cleaning tablets
- descaler
- spare water filters
- backup beans
- extra baskets
- blind basket
- appliance manual
- less-used accessories
Place the grinder and tamping area on the side that matches your dominant hand when practical.
Leave enough surface in front of the grinder to catch loose grounds. Do not crowd the tamping mat against the machine’s drip tray, where water can reach it.
For a realistic list of essential and optional equipment, see What You Need for Your First Espresso Setup.
10. The manual-brewing shelf
Manual brewers often work better as a compact collection than as separate stations.
Keep the most-used brewer visible and store alternatives nearby.
A useful arrangement is:
Counter
- kettle
- grinder
- scale
- current brewer
Shelf
- AeroPress
- dripper
- French press
- server
- filters
Drawer
- timer
- scoop
- brush
- spare filters
- thermometer
- cleaning cloth
Avoid displaying every brewer you own if it leaves no room to make coffee.
The station should provide a clear area for weighing, pouring, and setting down a wet brewer.
11. The pod coffee station
A pod setup can become cluttered because the small capsules feel easy to keep adding.
Store only one practical selection near the machine.
Organize by:
- regular
- decaf
- flavored
- different drink size
- household member
Keep unopened boxes elsewhere.
Include a container for used capsules from the beginning. Waste planning is one of the details often forgotten in decorative coffee-bar designs, even though it determines whether the surface stays tidy during everyday use.
12. The shared coffee-and-tea station
A shared beverage station works well when not everyone drinks the same thing.
Divide the setup into:
Shared items
- kettle
- cups
- spoons
- sweeteners
- napkins
- water
Coffee section
- machine or brewer
- beans or pods
- grinder
- filters
Tea section
- tea selection
- infuser
- small waste dish
- timer
Do not fill the station with every beverage option in the house.
Keep everyday choices visible and place occasional items in the cabinet. This prevents a practical drink station from turning into a crowded snack bar.
What belongs on the counter?
Keep an item visible when it meets at least one of these conditions:
- used almost every day
- heavy or difficult to move
- needs to remain plugged in
- needs ventilation
- is awkward to fit in a drawer
- supports the immediate workflow
For many coffee bars, the counter should contain only:
- primary coffee maker
- grinder
- small tray
- daily coffee
- one or two mugs
- waste solution
- cleaning cloth
Everything else can be stored.
A tidy station is easier to wipe, easier to understand, and less likely to collect unused syrups, stale coffee, and duplicate tools.
What should stay hidden?
Hide items that are:
- used less than weekly
- backups
- visually busy
- easy to spill
- chemical cleaning products
- empty packaging
- duplicate mugs
- seasonal flavors
- appliance parts
- spare brewers
Store cleaning chemicals away from coffee, cups, children, and food ingredients.
Do not pour descaling solution or grinder cleaner into decorative unlabelled containers.
Coffee-bean storage is not decoration
Glass jars filled with beans look attractive, but they are not always the best everyday storage.
The National Coffee Association recommends keeping coffee in an opaque, airtight container in a cool, dark place, away from heat sources and strong sunlight. It also recommends waiting to grind beans until close to brewing.
For a practical coffee bar:
- keep the current bag in an opaque airtight container
- store it away from the kettle’s heat and steam
- avoid the cabinet directly above an oven
- do not leave beans in strong afternoon sun
- display an empty decorative jar rather than sacrificing the beans you drink
Buying a beautiful transparent canister does not improve the setup when the coffee inside loses aroma faster.
Plan for water
Water is one of the most overlooked parts of a coffee station.
Consider:
- how the machine reservoir is removed
- whether it lifts upward or slides out
- the weight of the filled reservoir
- whether the sink is close enough
- whether a pitcher will be used
- where the pitcher will be stored
- where spills will run
- whether the surface tolerates moisture
A rear-mounted water tank may require pulling the machine forward. A top-loading brewer may need far more shelf clearance than its closed height suggests.
Test the refill motion before installing a shelf.
Plan for waste
Every coffee method creates something that must leave the station.
| Brewing method | Typical waste |
|---|---|
| Espresso | Wet puck, loose grounds, drip-tray water |
| Pod machine | Used capsule |
| Pour over | Wet paper filter and grounds |
| French press | Loose wet grounds |
| Drip machine | Filter and grounds |
| AeroPress | Compact puck and filter |
| Moka pot | Wet grounds in the basket |
Choose a disposal method during setup, not afterward.
Possible solutions include:
- espresso knock box
- small lidded compost container
- removable capsule bin
- lined waste cup
- nearby trash can
- tray for wet filters before disposal
A spoon rest or small dish also prevents used stirrers and wet measuring spoons from staining the counter. Practical organization advice increasingly treats this “in-between mess” as part of the setup rather than something to solve after the station is decorated.
Add a cleaning kit
A coffee bar should make cleaning easier than ignoring the mess.
Keep a compact kit with:
- dedicated dry grinder brush
- damp steam-wand cloth
- general counter cloth
- small towel for spills
- bottle brush when needed
- machine-approved cleaner
- machine-approved descaler
- spare filters
Do not use the same damp cloth for the steam wand, countertop, floor spills, and general kitchen cleaning.
For espresso equipment, create a clear distinction between daily wiping, coffee-oil cleaning, and descaling. Our espresso-machine descaling guide explains why these are separate maintenance tasks.
For grinder maintenance, see How to Clean a Coffee Grinder Without Damaging It.
Protect the counter
Coffee stations regularly deal with:
- water
- steam
- milk
- coffee oils
- syrup
- loose grounds
- heat
A removable mat or tray can protect a delicate surface, but it should not interfere with appliance stability or ventilation.
Good options include:
- washable silicone mat
- sealed wood tray
- stone or tile slab
- appliance mat designed for countertops
- water-resistant laminate surface
Avoid thick soft mats under equipment that needs a firm level base.
Wipe beneath the machine regularly. A tray can hide slow leaks and trapped moisture just as easily as it contains spills.
Use lighting for work, not only atmosphere
Warm accent lighting can make a coffee station inviting, but you also need enough light to see:
- the scale
- espresso flow
- water level
- coffee grounds
- milk texture
- spills
- dirt around the machine
Under-shelf lighting is often more useful than a decorative lamp because it does not occupy the counter.
Choose lighting that does not shine directly into your eyes while you stand at the station.
Three realistic coffee-bar budgets
These are project budgets rather than fixed product prices. Reuse what you already own whenever possible.
Under $50: organize an existing counter
Use:
- existing counter space
- washable tray
- drawer dividers
- small waste container
- hooks or inexpensive shelf
- repurposed jars for non-coffee items
- existing mugs
Spend the money on reducing clutter, not buying decorative coffee signs.
Around $150: create a defined station
Possible additions:
- stable cart or secondhand sideboard
- drawer organizers
- shelf
- mug hooks
- counter mat
- storage container
- basic lighting
- waste solution
Check used furniture carefully for wobbling, water damage, and insufficient depth.
$500 and above: build a permanent zone
This may include:
- quality sideboard or cabinet
- professionally installed outlet
- lighting
- durable countertop
- custom drawers
- appliance garage
- plumbing or nearby water access
- shelving designed around equipment
Electrical, plumbing, and structural changes should be handled according to local requirements and by qualified professionals where needed.
Do not spend heavily until you have used a temporary version of the layout. A few weeks of normal coffee-making will reveal where the grinder, waste, water, and cups actually belong.
How to style the coffee bar without creating clutter
Choose one or two visual ideas rather than adding every café-themed item you find.
Possible directions include:
- warm wood and black metal
- white ceramics and light oak
- stainless steel and dark stone
- vintage mugs with simple shelves
- neutral containers with one accent color
- a small framed coffee print
- one plant positioned away from heat and spills
Decoration should not block:
- water refilling
- ventilation
- cup storage
- machine controls
- cleanup
- outlet access
The equipment and mugs already create visual interest. You do not need to fill every empty section of wall.
Common DIY coffee-bar mistakes
Starting with décor instead of measurements
A beautiful cabinet is not useful when the espresso machine hangs over the front or the water tank cannot open.
Keeping every mug on display
Display the mugs you use. Store the rest.
Putting beans in sunny glass jars
Opaque, airtight storage in a cool location protects coffee better than a decorative transparent container.
Forgetting the waste route
A station without a place for pucks, filters, or capsules becomes messy immediately.
Installing shelves too low
Check the machine with tanks, hoppers, and lids fully open before drilling.
Using an unstable cart
Coffee machines contain hot water. Stability matters more than the cart’s appearance.
Blocking electrical access
Do not trap plugs behind furniture where you cannot disconnect the equipment safely.
Overloading the station
More accessories do not create a better workflow.
Storing cleaners beside beans
Cleaning products should remain clearly labeled and separated from food and drink supplies.
Ignoring the route to the sink
A station at the opposite end of the house may look convenient but create repeated trips with dirty, dripping equipment.
A 30-minute coffee-bar reset
You can improve an existing setup without rebuilding it.
First 10 minutes: remove everything
Take away:
- unused mugs
- old coffee
- empty boxes
- duplicate tools
- expired syrups
- appliances you rarely use
Clean the surface.
Next 10 minutes: rebuild the workflow
Return items in this order:
- Main brewer
- Grinder
- Preparation space
- Waste container
- Daily coffee
- Cleaning cloth
- Daily mug or cups
Final 10 minutes: store the rest
Move backup and occasional items into:
- drawer
- cabinet
- labeled box
- pantry
- another shelf
Make one cup of coffee afterward.
Notice where you naturally reach and where spills occur. Adjust the station based on the real routine rather than the appearance of the empty counter.
Frequently asked questions
How much space do I need for a coffee bar?
A small pod or manual-brewing station may fit into a narrow counter corner. An espresso station needs additional room for the grinder, preparation, milk, waste, and water access. Measure the equipment in its open and operating positions rather than relying only on the listed width.
Does a coffee bar need a sink?
No. A nearby sink makes water refilling and cleanup easier, but many practical stations work without one. Consider how often you will carry reservoirs, wet filters, milk pitchers, and drip trays.
Can I use a dresser as a coffee bar?
Yes, when it is stable, deep enough, in good condition, and appropriate for the weight and moisture involved. Protect the surface and confirm safe outlet access before placing electrical appliances on it.
Can I put a coffee bar in a dining room?
Yes. A sideboard in a dining room can work well, especially for serving guests. The main disadvantages are carrying water, milk, used grounds, and dirty tools between rooms.
What should every coffee station have?
At minimum:
- brewer or machine
- coffee
- mug
- required filter or capsule
- water access
- preparation space
- waste solution
- cleaning cloth
Everything else depends on the brewing method.
How do I keep a coffee bar from looking cluttered?
Keep only daily-use items visible, group small accessories on a tray, use one drawer or cabinet for backups, and remove an older item when adding something new.
Where should coffee beans be stored?
Keep them in an opaque, airtight container in a cool, dark place away from heat, moisture, and strong sunlight.
Can I place an espresso machine under a cabinet?
Often, but you must check the required operating clearance, ventilation, water-tank access, hopper opening, and steam. Follow the placement instructions in the machine’s manual.
Should the grinder stay beside the coffee machine?
Usually, yes. Keeping the grinder close reduces spilled grounds and makes the preparation sequence easier. Leave enough space between the grinder and machine to weigh and prepare coffee comfortably.
What is the best coffee-bar idea for a small apartment?
Use an existing counter corner with one tray and one drawer. A rolling cart is useful when counter space is unavailable, but only when it is stable and has safe access to power.
The takeaway
A good DIY coffee bar begins with measurements and workflow, not decoration.
Choose a location near safe power and reasonable water access. Give the main equipment enough room to open, refill, and operate. Keep daily tools within reach, hide backups, and plan for grounds, spills, milk, and cleaning from the beginning.
A single counter corner can work better than a large custom cabinet when every item has a purpose.
Build the smallest station that comfortably supports the coffee you actually make. You can add shelves, furniture, and decorative details after the routine works.